A Designer's Honest Review of the MRI Machine Embroidery Design
When a new embroidery file lands in my library, my first question is always the same: will this look good in thread? Today, I’m looking at the MRI Machine design. It’s a piece that falls squarely into the medical category, but as a craft, its potential is far broader. Let’s walk through how this design might perform in real project use, from a custom sweatshirt for a radiologist to a thoughtful gift for a medical student.
The First Impression: Clean, Clinical, and Surprisingly Versatile
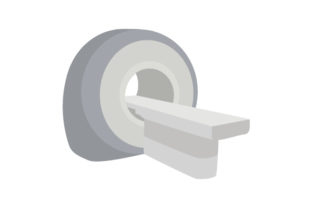
The MRI Machine design presents a clean, graphic representation of the scanner. Its shape is iconic and recognizable, which is a huge advantage. The mood it creates is professional, intelligent, and slightly technical—but not cold. There’s a certain awe in the machine’s form that translates well visually. The layout is straightforward, focusing on the machine’s distinctive silhouette and core details. This isn’t an overly detailed illustration; it’s more of a bold graphic. That simplicity is its strength for embroidery, where too much fine detail can become a muddy mess of stitches.
Its visual personality feels authoritative yet approachable. It doesn’t scream “hospital” in a scary way; it speaks to pride in the field, to curiosity, and to achievement. I immediately thought it would be perfect for a personalized gift—a tote bag for a doctor who loves their work, or a pillow cover for a clinic’s lounge area. For a crafter or small business owner, this is a niche design, but within that niche, it holds significant value.
Where This Design Would Thrive in Your Projects
Let’s picture a real scenario. You’re preparing a custom embroidered sweatshirt as a graduation gift for a newly minted MRI technician. You want it to feel special, handmade, and meaningful. This design fits that bill perfectly. Stitched onto a high-quality, dark heather gray sweatshirt with a crisp white thread, it would look striking and professional.
Beyond apparel, consider its application on other handmade products. A durable cotton tote bag for carrying textbooks or work gear. A subtle, well-executed patch on a denim jacket. Even as a decorative accent on a tea towel in a science-themed kitchen. For a small shop owner or Etsy seller catering to the medical community, this design could become a key part of your merchandise lineup—from boutique-branded lab coats to celebratory baby clothes for a neurosurgeon’s new arrival (a fun, clever twist on the “my dad is a…” theme).
The design’s clarity boosts product value. A clean stitch-out on a premium fabric signals care and skill, building customer trust. For commercial embroidery projects, like a batch of caps for a radiology department, the recognizable graphic ensures quick recognition and a polished, unified look.
Handling the Stitch: Practical Considerations for a Smooth Finish
This is where the designer’s mind shifts to the practical. The provided file formats—SVG, PNG, EPS, DXF—cover a good range, suitable for both digital previews and machine use. However, the exact stitch count, hoop size, and machine compatibility aren’t detailed here, so you must check those with your specific file and software. That’s a universal first step.
Given the design’s likely use of solid areas (the machine’s base, the patient table), stitch density will be key. On textured fabrics like sweatshirt fleece or a canvas tote, a dense fill stitch might sink in and look flat. A good stabilizer choice is non-negotiable. I’d advise testing on scrap fabric first, especially if you plan to use it on stretchy fabric or thin fabric like a t-shirt. The design’s structure seems robust, but small details—like the circular opening—need to be inspected in the stitch-out to ensure they remain clear and don’t pinch or distort.
Careful Placement: Where to Use (and Where to Avoid)
This design has a strong central form, so it wants space. I would avoid very small hoop sizes. Squeezing it onto a tiny baby bib might lose its impact and make the stitches too dense. Similarly, on highly curved surfaces like a cap, the elongated shape might require careful positioning to avoid distortion at the sides.
Dark fabric backgrounds are a natural fit, given the clinical, often white-on-dark association. But test it in black and white mockups. How would it look reversed, with dark thread on a light apron? Check thread color contrast thoroughly. You might choose a cool gray instead of pure white for a softer look on a pillow cover.
For products that need frequent washing—like kitchen towels or everyday apparel—a robust stitch construction is vital. Again, that initial test on scrap, washed multiple times, will tell you everything about its durability.
The Business Angle: From Hobbyist to Commercial Use
For the creative entrepreneur, this design is a solid design asset. Its niche appeal means it can help build brand consistency for a shop focused on medical or science-themed crafts. Its giftability is high for a specific audience. A well-embroidered pillow with this design feels more thoughtful than a generic store-bought item.
Before selling finished items or digital products using this file, confirm its licensing. Can it be used for commercial embroidery projects? This step protects your business and your customers. Using it in printable mockups for your Etsy listings can beautifully showcase the potential finished product, driving buyer engagement.
Ultimately, the MRI Machine embroidery design succeeds by being exactly what it needs to be: a clear, stylized representation of an iconic object. It doesn’t try to do too much, which in embroidery, is often the secret to a stunning final product. It offers a professional, confident aesthetic that, when stitched with care, results in a handmade piece that carries genuine meaning and weight. Whether for a personal project or a small shop product, it’s a file worth having in your toolkit for that perfect, purpose-driven project.